
At the Bangladesh Coffee Academy, we believe latte art basics isn’t an exclusive talent reserved for high-end cafe pros. It is a science wrapped in muscle memory. It sits precisely at the intersection of fluid dynamics, temperature control, and sensory feel. Once you pull back the curtain on why the milk behaves the way it does, the mystery evaporates.
Latte art is the ultimate magic trick of the coffee world. When executed flawlessly by a seasoned barista, it looks effortless—a casual flick of the wrist, and a pristine white tulip emerges on a canvas of rich, hazelnut crema.
But anyone who has tried it at home knows the frustrating truth: your first dozen attempts usually look less like a elegant leaf and more like an accidental cloud (or a giant, sad blob).
Before you even touch your milk pitcher, you have to understand the chemistry happening inside your cup. You aren’t “drawing” on top of coffee the way an artist paints on canvas. Instead, you are managing a delicate collision between two distinct textures: properly aerated microfoam and a well-extracted espresso crema.
The striking contrast of a pristine design relies entirely on how these two elements interact.
A flawless design requires a sturdy foundation. Your espresso shot doesn’t need to taste competition-perfect to host latte art, but it must have a stable, uniform layer of crema.
The Crema Rule: Fresh coffee is non-negotiable. As coffee beans age, they lose their trapped carbon dioxide, resulting in a thin, fragile crema that dissolves almost instantly. If your designs look dull, washed out, or blurry around the edges, the culprit is almost always stale coffee beans, not your hand technique.
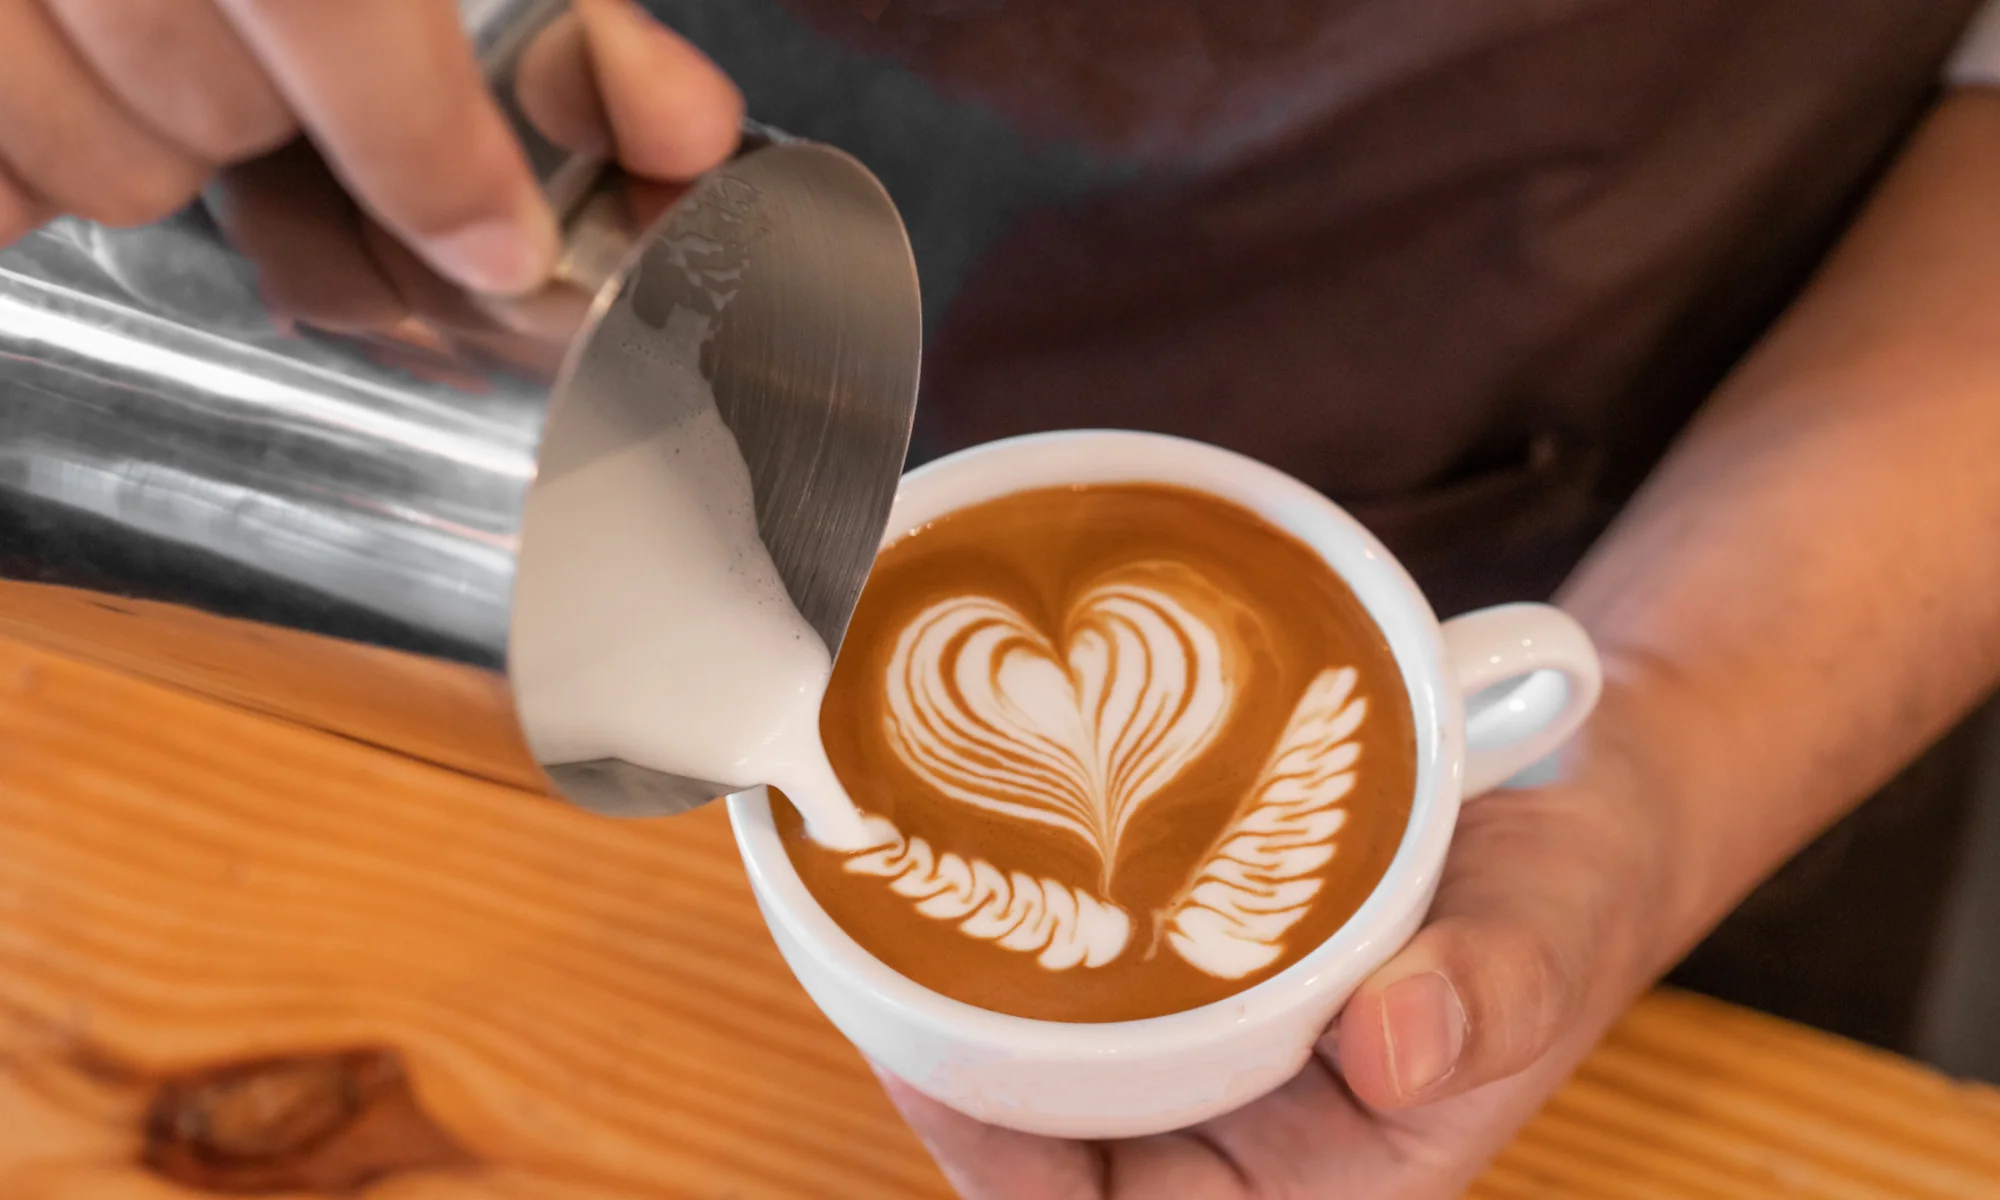
Milk texture is where 90% of home baristas hit a wall. The goal isn’t just “hot, frothy milk.” You are aiming for microfoam—a velvety liquid that looks exactly like wet, glossy paint.
When you finish, the surface should look like a mirror. If you swirl the pitcher, the milk should glide smoothly around the walls without separating.
Understanding the relationship between height and flow rate is the biggest breakthrough you will have on your latte art journey.
[ High Pitcher Position ] ──> Milk dives deep beneath the crema (Fills the cup)
[ Low Pitcher Position ]  ──> Milk floats gently on top of the crema (Creates the design)
Start your pour with the pitcher held about 2–3 inches above the cup. Pour a thin, steady stream directly into the center of the espresso. Because of the height, the milk gains enough velocity to pierce the crema, diving beneath the surface to mix evenly with the espresso. This lifts your crema up and fills the volume of the cup without disrupting your dark canvas.
Once your cup is roughly half to two-thirds full, bring the spout of your pitcher down as close to the liquid surface as physically possible—almost touching it. As you lower the pitcher, increase your flow rate slightly. Because you’ve eliminated the height, the milk loses its downward momentum. Instead of diving under, the glossy microfoam floats effortlessly on top of the crema, blooming into your white pattern.
Have you ever poured a pattern that looked structurally correct, but the edges appeared messy, jagged, or separated? This is called splitting.
Because espresso is naturally acidic and milk is slightly alkaline, they don’t instantly combine into a harmonious liquid. There is a brief fraction of a second where they resist one another.
If you pour too aggressively or with an inconsistent flow, you disrupt the stabilization process, causing the milk and coffee to separate texturally. This is also why lighter, highly acidic fruit-forward roasts are notoriously harder to pour designs onto than traditional medium-to-dark espresso roasts. Keep your stream smooth, continuous, and calm to maintain clean contrast lines.
Don’t jump straight to complex rosettas. At the Bangladesh Coffee Academy, we always start our students with the foundational Heart. It teaches you everything you need to know about flow control and timing.
Once you lock down the heart, you can progress to stacking layers for a Tulip, and eventually introducing a gentle side-to-side wrist wiggle to paint a Rosetta.
At the end of the day, the ultimate secret to mastering latte art is sheer repetition. Every single pour is a data point for your hands and eyes. Pick one single pattern—like the heart—and commit to refining it every morning. Before you know it, your muscle memory will take over, and your morning coffee will officially become your morning masterpiece.
